NOTE: this article covers usage of the previous Air Quality Wing library and hardware. Please refer to the docs for the latest version of the Air Quality Wing
Air quality.
You probably think about it more now that our clean air has turned into a permanent haze across the sky.
Yuck.
I’ve previously written about the subject. This post is a straight-to-the-point version which will get you up and running quick!
Gather the Goods

Get everything together that you’ll need for this project.
This includes:
- A Particle Mesh board (Argon, Boron, Xenon). You can get them almost anywhere. Buying direct always works too. Note: if you’re just starting out, the Argon is your best bet.
- Air Quality Wing Board.
- Honeywell HPMA115S0 Particle Sensor.
- Cable for HPMA115S0 Sensor. ( The last three you can get here. )
The Leg Bones Connect to The ..
Put everything together in the short few steps below:
-
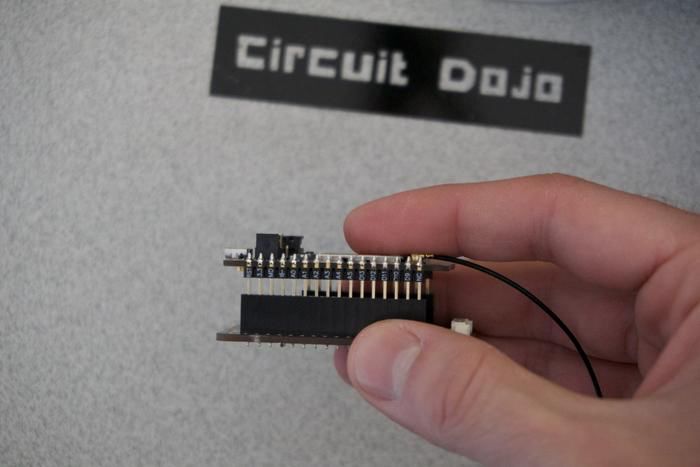
Attach the Particle to the Air Quality Wing board
-
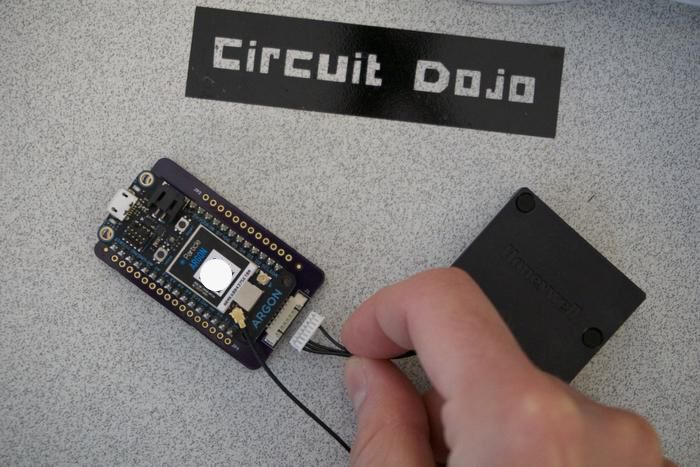
Connect the HPM Particle sensor to the Air Quality Wing using the cable
-
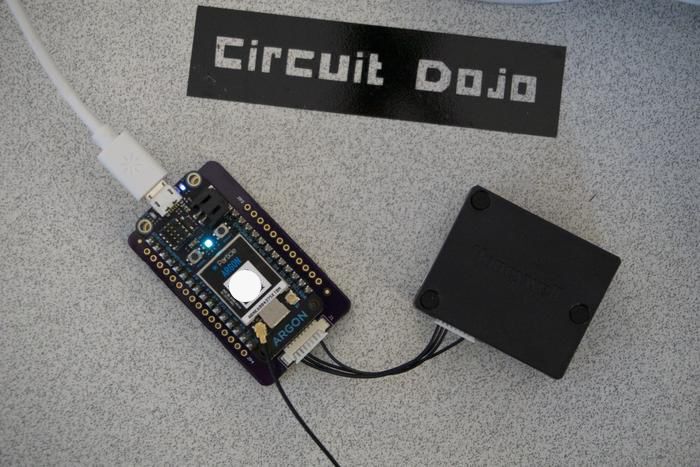
Plug in USB!
Installing Particle Workbench
Particle Workbench is the place that all your Particle Mesh development will happen. Its technically a plugin on top of Microsoft’s Visual Studio Code. You can get it in two ways:
Download it here directly from Particle: https://www.particle.io/workbench
Or, install Visual Code directly: https://code.visualstudio.com
Then you can install the Particle Workbench application using the extensions window in Visual Code.

Click the green Install next to Workbench and all the dependencies will be installed!
Setting Up and Using Git
Throughout this guide, we’ll be using Git extensively to download example code. You’ll have to install it on your computer if you haven’t already. Here’s a link to the download page.
Before we can run any commands, git has a dependency on ssh. In order to use services like Github, Gitlab and Bitbucket, you’ll have to register your SSH public key. For Unix devices your private key is located in ~/.ssh. By default it’s called something like id_rsa.pub.
If you’re missing it, you can create one using ssh-keygen:
jared@ceznamac:~/.ssh$ ssh-keygen
Generating public/private rsa key pair.
Enter file in which to save the key (/Users/jaredwolff/.ssh/id_rsa):
Enter passphrase (empty for no passphrase):
Enter same passphrase again:
Your identification has been saved in /Users/jaredwolff/.ssh/id_rsa.
Your public key has been saved in /Users/jaredwolff/.ssh/id_rsa.pub.
You’ll want to copy the contents of id_rsa.pub and add it to your Git server of choice.
Here’s a screenshot from Github’s settings page. There are several keys set up for this account.

Click the green New SSH Key and copy the contents of your id_rsa.pub (the .pub is important!) to the Key text field:

Once you’ve added your key, you can check by running the following command:
ssh -T git@github.com
If you are prompted to add the RSA fingerprint, select yes.
jaredwolff:~ jaredwolff$ ssh -T git@github.com
The authenticity of host 'github.com (140.82.114.3)' can't be established.
RSA key fingerprint is SHA256:nThbg6kXUpJWGl7E1IGOCspRomTxdCARLviKw6E5SY8.
Are you sure you want to continue connecting (yes/no)? yes
Warning: Permanently added 'github.com' (RSA) to the list of known hosts.
Afterwards you should get some output:
Hi jaredwolff! You've successfully authenticated, but GitHub does not provide shell access.
If you got this far, that means you’re set up! If you’re having issues, backtrack to make sure you’ve setup your SSH key appropriately. Github also has some great in-depth support on the subject.
Installing the Command Line Interface
One thing you’ll have to do separately from installing Particle Workbench, is to install the CLI. For Mac and Linux, the easiest thing to do is run this command:
bash <( curl -sL https://particle.io/install-cli )
This will install everything you need to get started with developing on Particle Mesh.
For Windows, you can go here to download the installer.
As you become more familiar with the Particle ecosystem, you’ll find yourself using the CLI more and more. Time to start using it now!
Provision your Particle Device
The easiest way to provision a Particle Device, especially if you’re new, is to use your smart phone.
Here’s an example using an Argon.
-
Plug in the USB cable and hold the mode button at the same time**.** Continue holding the mode button until the RGB LED starts blinking blue. As long as you have the original Tinker firmware installed, the device should always behave this way.
If your device has never been provisioned before, it will start up in this mode. Skip this step.
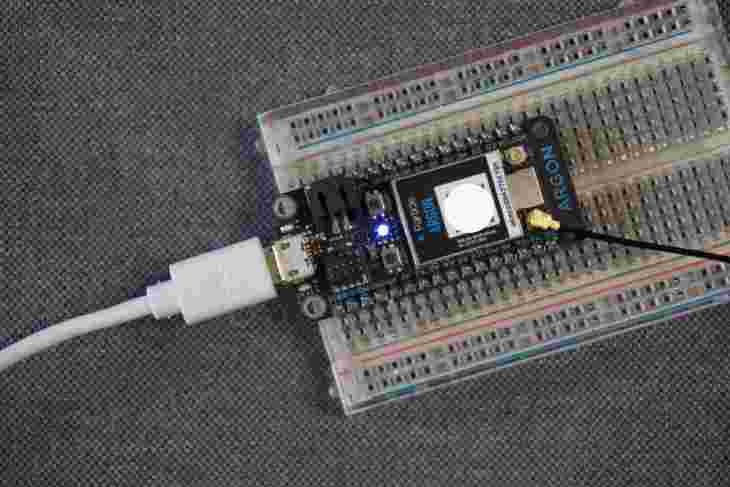
Note: make sure you attach your Wifi antenna. It should plug in on the left side. (Above the A in Argon)
-
Install the Particle App if you haven’t already.
-
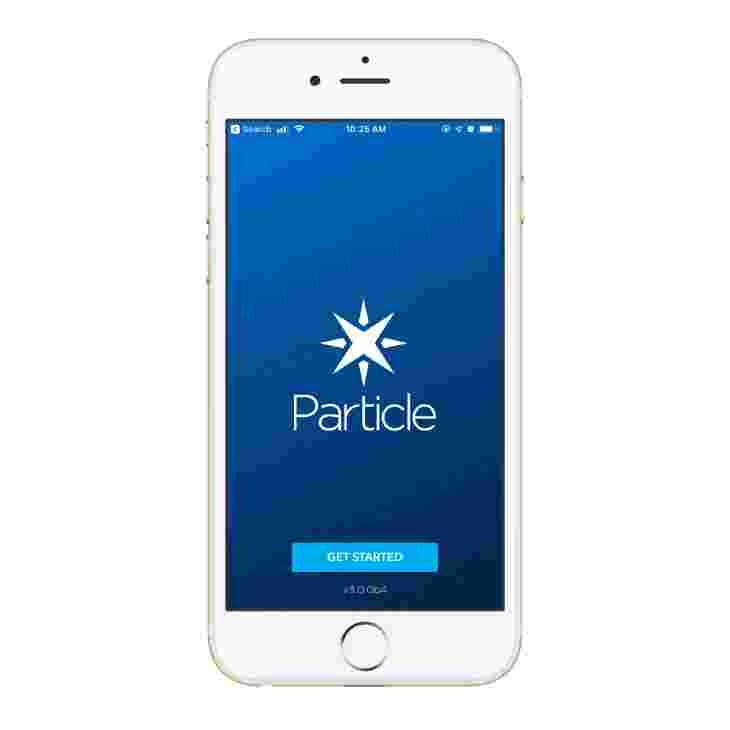
Open the Particle App on your phone.
-
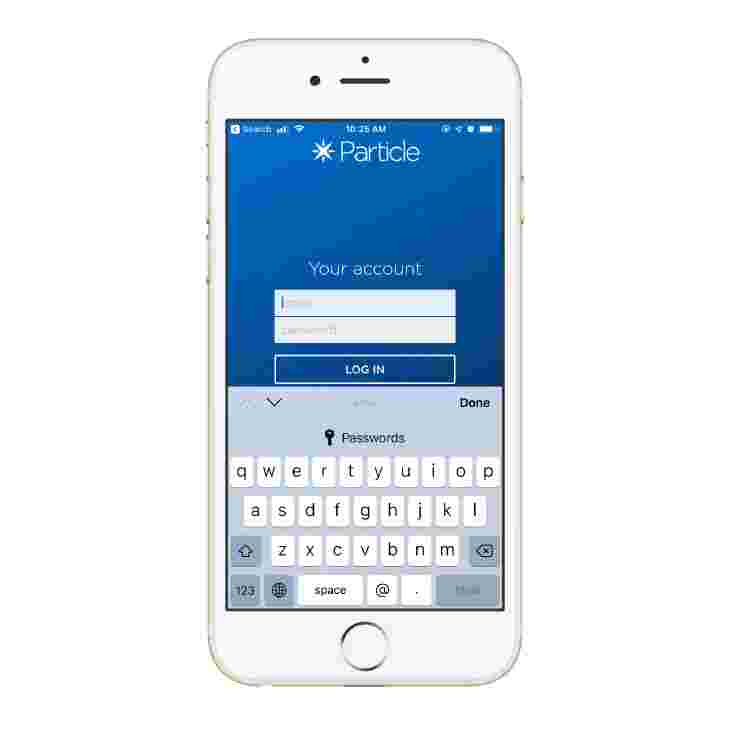
Log in by tapping Get Started if you haven’t already.
-
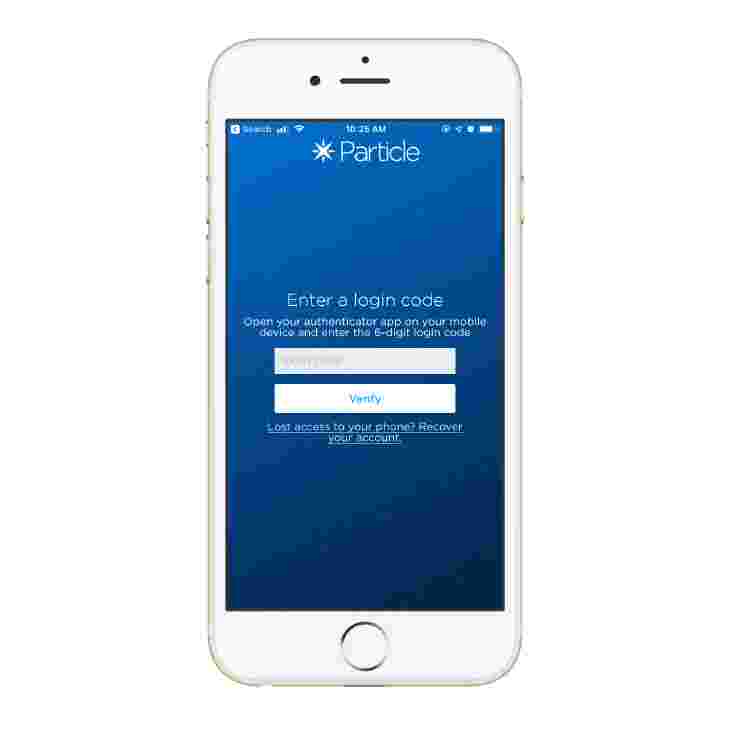
Enter your Authenticator code if you set up with 2FA. (Highly recommended)
-
Tap the plus button in the top right Then tap Argon/Boron/Xenon.
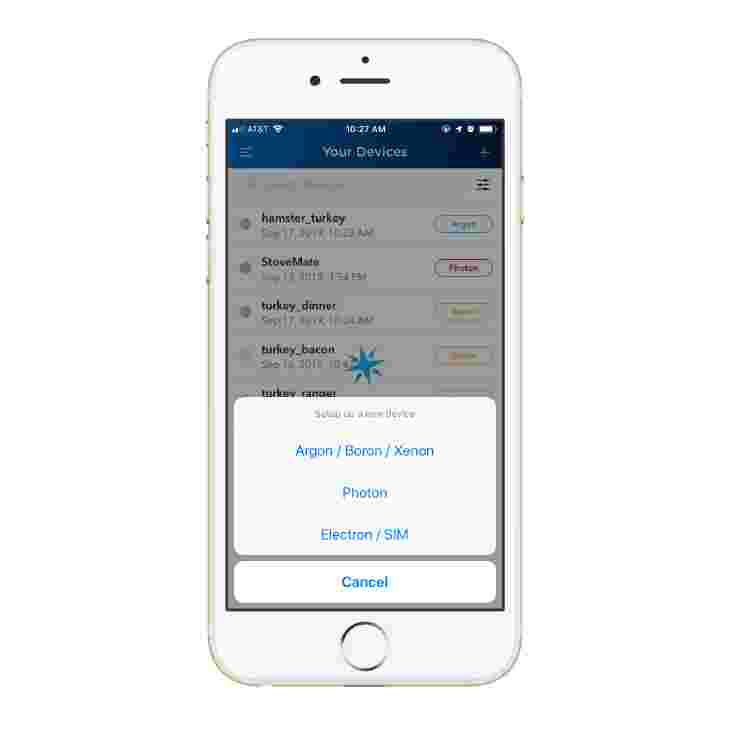
-
The app then should walk you through the remainder of the process
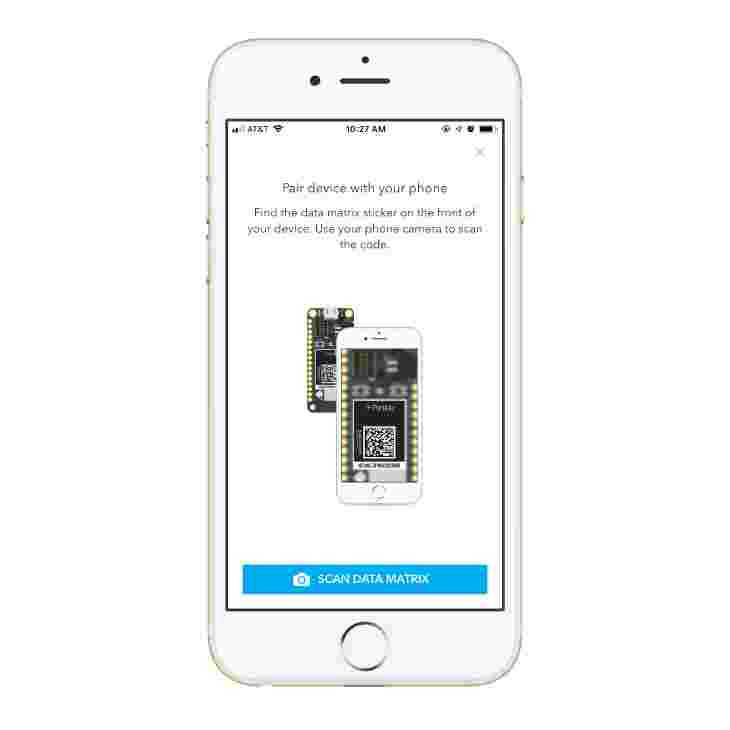
-
During the setup process, the app will ask you to name this device. Keep this name handy for the next step in the process.
-
Also, if you have set up a mesh network, make sure you remember the Admin password for your mesh network.
Download the Code
The Air Quality Wing does require a Particle Argon, Boron or Xenon to work. You will also need to program the firmware. Here are the steps to get everything up and running.
First, let’s clone the code from your freshly set up Github account.
git clone git@github.com:jaredwolff/particle-squared-code.git
This will create a folder with all the firmware source files.
Next let’s open up that folder using Particle Workbench.

Our main source file particle-squared.ino can be found src directory. Double click to open it up.
At the bottom of the screen select your device type. You should select argon boron or xenon depending on what board you have.

Select your firmware version. As of this writing it’s recommended to use 1.4.0.

Remember what I said earlier about saving the name of the device? Now’s the time to use it! Enter it in the box next to the Device OS version.

Flash your device
Now, let’s flash the firmware! We’ll be using Particle’s Cloud Flash capabilities.
The easiest way to invoke a Cloud Flash is by clicking the lightning bolt button in the top right of Particle Workbench

During programming you should see your device flash purple. It may take up to several minutes especially if the OS needs to be upgraded.
Check your data
As a final sanity check, let’s make sure that the data is being published to the cloud.
First let’s check locally using the serial console.
Make sure your device is connected and then run:
particle serial monitor --follow

If you wait long enough you should see updates on your command line:
Last login: Sun Sep 15 16:01:32 on ttys004
pjaredwolff:~ jaredwolff$ particle serial monitor
Opening serial monitor for com port: "/dev/tty.usbmodem145201"
Serial monitor opened successfully:
ccs811 ver 2.0.1
ccs811 no update nerestore sgp30 baseline
Air Quality Wing
temp rdy
tvoc rdy
sgp30 rdy
bme680 rdy
data send
temp rdy
tvoc rdy
sgp30 rdy
bme680 rdy
data send
Once we see it locally, let’s check the Particle Cloud.
Login and navigate to your newly provisioned mesh device.

Then you can watch the console for updates:

Updates not happening fast enough? You can update the measurement period by changing set_period to 30000. Once you see data you can set it back to the default of 120000 or simply reset the device.
Sending Data to Google Docs
A easy way to visualize your data is to use Google Docs to visualize your data. Here are the steps:
- Create a new Google Sheet
- Then click the Tools menu and click Script Editor
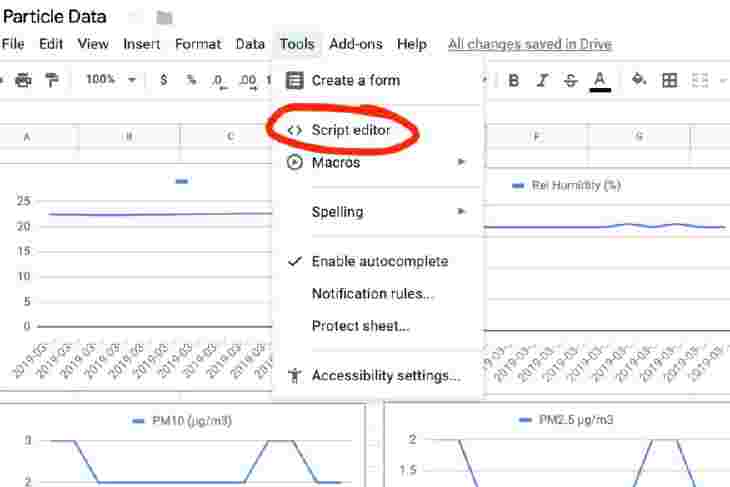
- Create a new script
- Insert the below code into the script:
  //this is a function that fires when the webapp receives a POST request
   function doPost(e) {

     //Return if null
     if( e == undefined ) {
       Logger.log(“no data”);
       return HtmlService.createHtmlOutput(“need data”);
     }

     //Parse the JSON data
     var event = JSON.parse(e.postData.contents);
     var data = JSON.parse(event.data);

     //Get the last row without data
     var sheet = SpreadsheetApp.getActiveSheet();
     var lastRow = Math.max(sheet.getLastRow(),1);
     sheet.insertRowAfter(lastRow);

     //Get current timestamp
     var timestamp = new Date();

     //Insert the data into the sheet
     sheet.getRange(lastRow + 1, 1).setValue(event.published_at);
     sheet.getRange(lastRow + 1, 2).setValue(data.temperature);
     sheet.getRange(lastRow + 1, 3).setValue(data.humidity);
     sheet.getRange(lastRow + 1, 4).setValue(data.pm10);
     sheet.getRange(lastRow + 1, 5).setValue(data.pm25);
     sheet.getRange(lastRow + 1, 6).setValue(data.tvoc);
     sheet.getRange(lastRow + 1, 7).setValue(data.c02);

     SpreadsheetApp.flush();
     return HtmlService.createHtmlOutput(“post request received”);
   }
Configure Webhook

- Go to Publish and click Deploy as Web App
- Set Execute the app as yourself
- Then set Who has access to the app to Anyone, even anonymous. (Important: if you’re working with. mission critical data, you may want a more robust and custom solution. This allows anyone, if they have your web hook link to post data to that page!)
- Change the Project Version to new and deploy!
- Copy the Current App URL that the output provides.
Configure Particle Cloud

- In the Particle.io console, go to the Integrations section and Create a New Webhook
- Fill in the name of the event that get’s forwarded from the code (in this case it’s blob)
- Enter the Current App URL from the last step in the URL Box
- Set the request type to POST
- Set the request format to JSON
- Target the device you’ll be using (or leave it as is if you only have one device)
- Click save
Beam me up

It’s time to program your board. Follow the steps below:
- Setup your Particle Account and Particle Mesh device. Use the Quickstart if you haven’t done this before.
- Download Particle Workbench and install if you haven’t already. Instructions here.
- Get the code here.
- Once the code is downloaded, open it with Visual Code (that you installed in Step 1)
- Login to Particle if you haven’t already (The fastest way is to hit Command + Shift + P to open the command window. Then start typing login)
- Publish to Particle Cloud - Again this uses the command window. Use the same Command + Shift + P as above and type Cloud Flash.
- Once you’ve found the Cloud Flash option, press enter.
- Your board should be programmed shortly. You can watch the LEDs for changes during this time. Once it’s glowing blue, you’re good to go!
Last Step (I promise)
- In the Google sheet you can create a header in the first row with all the labels.
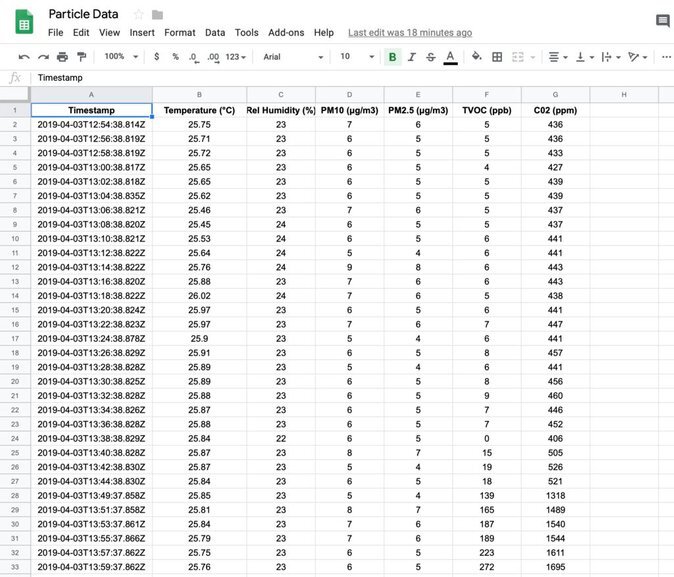
- You should notice by now that new data is showing up in the sheet (if you set everything up correctly). Go back to the previous steps if you don’t see it.
- You can graph the data by selecting a full column and creating a new chart from it.
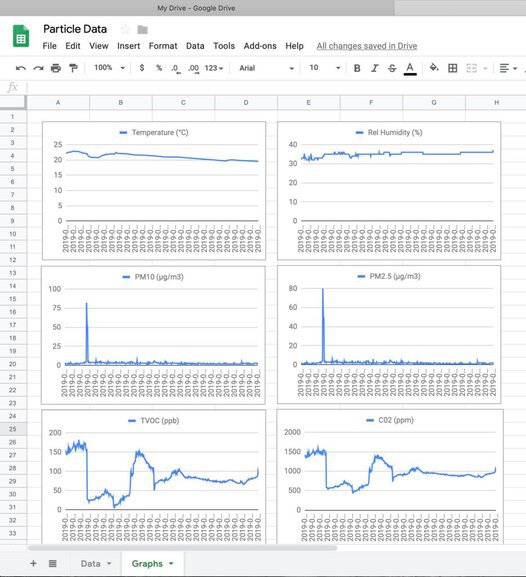
- You can graph everything in one or in separate like I’ve done above. Here’s an example from my setup.
If everything is working and you have some pretty graphs, congrats!! If you’re ready to move on to the next step using an IoT service like Adafruit’s check out my full guide here.
Last Modified: 2021.12.8


