I got my hands on some of the mesh based Particle boards not too long ago. I’ve been itching to try them out but haven’t quite figured out the project.
One thing has been bothering me though: air quality. I spend a good amount of time in my office tinkering, soldering, coding and writing. I sneeze occasionally so I always wondered, how bad is it? The house is also prone to mold exposure during the hot months which had me concerned.
So why not cook something up?
What’s needed

The most important sensor is the Honeywell HPM series PM2.5/PM10 sensor. This tells you how many micrograms of material is floating around in a cubic volume of space. i.e. it counts the little particles flying around in your air.
Second to that, is the AMS CCS811. This sensor tells you the total amount of volatile organic compounds are in the air along with things like C02. It’s another datapoint which is interesting to see. I’ve previously placed this sensor in our basement only to be surprised and see huge spikes in VOC and C02 levels from our (oil burning) furnace turning on in the morning. Time for better ventilation!
Finally, the Silicon Labs Si7021 temperature and humidity sensor. These two bits of environmental data are useful. More importantly they’re used by the algorithm in the CCS811 to compute the TVOC and C02. Considering the cost of the CCS811, I’m surprised it doesn’t have these measurements on board but maybe in their next revision..
Wiring it all together
It’s time to wire everything together. At the very least you’ll need:
- Solder-less breadboard hookup wire
- A solder-less breadboard
- A CCS811 breakout board from Adafruit (more details here)
- A Si7021 breakout from Adafruit(more details here)
- A Particle board of your choice.
- A HPMA115 Particle sensor
- Pre assembled Molex cable for the HPMA115 (Molex P/N 0151340803 or similar)
- Some 0.1” pitch headers
I’ve included a Fritzing example with this project. There’s also a hookup image below:
 Note: the original Fritzing diagram was incorrect. Both Vin of the CCS811 and Si7021 should be connected to the 3.3V on the Particle
An Adafruit Feather is used to represent the Particle Argon. Particle does not have Fritzing models quite yet.
As you can see everything is hooked up except for the PM2.5 sensor. The pinout is included below.

The most important pins are the 5V, GND, RX and TX pins. The other ones can stay disconnected if you choose. Here are the connections called out:
5V     -> USB
GND    -> GND
RX     -> TX (on the Argon)
TX     -> RX (on the Argon).
Here’s a picture of everything assembled on a solder-less breadboard.

Another important note is that I modified the cable for the HPMA so they had male pins on the end. That made it easy to insert into the solder-less breadboard. Here’s a zoomed in shot:

When you purchase the cable for the PM2.5 sensor it came pre-populated with 8 wires. To make things simpler, you can remove 4 of the wires that are not used. The best way to do that is take a sharp tipped tool (dental pick, sewing needle, etc) and stick it under the clips I’ve pointed out in red below:

Then, once you have your sharp implement underneath, tug on the wire and it should slide out.
Now you have less wire and less headache. You can use this technique to modify any Molex-like connector.
Plumbing the firmware
For this project I decided to keep my code consistent with the Wiring/Arduino-like API. That means object oriented C++. It’s been a while where I’ve coded in C++ so when you’re looking at the codebase and wondering “why the hell did he do that!?” Sorry, not sorry. 😉
The best way to get started is to use Visual Code with the Particle plugins for this project. Click here to get started if you’re not already setup.
Si7021
The Si7021 is super simple. It only has 4 active pins out of the 6 on the chip.
 (Copied directly from the Si7021 documentation)
The best say to read the temperature/humidity sensor is to issue a blocking read command. In an embedded world, this is not ideal. Unfortunately, there’s no way to know when the readings are ready because there is no interrupt pin.
As described in the data-sheet, you first write the command and then attempt to read directly from the device. The code looks something like this:
    // Si7021 Temperature
    Wire.beginTransmission(SI7021_ADDRESS);
    Wire.write(SI7021_TEMP_HOLD_CMD); // sends one byte
    Wire.endTransmission();           // stop transaction
    Wire.requestFrom(SI7021_ADDRESS, 2);

    // Get the raw temperature from the device
    uint16_t temp_code = (Wire.read() & 0x00ff) << 8 | (Wire.read() & 0x00ff);
Wire the address of the device, write the command and then subsequently read the number of bytes necessary (Two in this case) The Si7021 will then stretch the clock until the reading has completed.
I didn’t mess around with other settings. Depending on your environment you may have to tweak how much current to feed the heater. You’re mileage may vary so prepare accordingly!
Finally, these readings are read on a reoccurring timer. I originally was using the millis() call and calculating the different of the start and current time but this eventually breaks (in 50 or so days). Instead I decided to use a system timer (similar to if not the same as the APP_TIMER in the NRF SDK)
Timer timer(MEASUREMENT_DELAY_MS, timer_handler);
That way you get your interrupt always at MEASUREMENT_DELAY_MS no matter what! (In my case MEASUREMENT_DELAY_MS = 60000 ms == 60s)
The CCS811
The CCS811 gives you a bit more freedom to play but it comes with it’s own specialness.

In most cases the ADDR pin is set low. This pin modifies one bit of the address. This is useful if you have two of the same device or two devices with the same address on the same I2C bus.
The CCS811 also has a few handy input and output pins. The most important is the interrupt pin. Whenever a reading is complete, this open drain pin will be pulled low. It will only get reset once you read the status register. This is great for asynchronous reads that way you’re not locking up your MCU.
One important point is that the CCS811 does require you to issue a “start” command. This forces the internal MCU to start executing the TVOC/CO2 sensing algorithm. If you attempt to read the data registers before the application is started you will get bogus data. (The command is 0x90)
In the firmware, the CSS811 is processed in the same loop as the Si7021. The code pulls the available data from the CSS811 asynchronous readings. No blocking code!
The HPMA115
The particle sensor is a bit more tricky. When it is turned on, the device starts sending particulate data on a regular interval. i.e. it’s in auto-send mode every time it powers up.
I tried previously to configure the device but sometimes I wouldn’t get a response back. It was always hit and miss. It drove me crazy.
So, in order to turn the device off wen you’re not using it I highly suggest using a load switch of some kind. Not only will this save power but according to Honeywell, it will also increase the lifespan of the fan.
The flow of the readings:
- Every minute turn it on
- Wait for data to be sent
- Read the reading asynchronously via UART
- Turn it off
- Bundle that data into the JSON blob to be sent to the server
This way there’s no need to mess with any registers. All the more reason why I2C and even SPI are better data buses than UART. I just want it to work!

I originally chose this sensor a while back for it’s enclosed nature. In my option, it’s easier to integrate. My electrical engineer brain doesn’t want to deal with complex stuff. Give me a box and lets go.
Getting everything working
During the development phase of this project I happened to be traveling abroad. The crappy wifi was not cutting it and it was taking forever to iterate on the code. The Argon also had a hard time connected to my iPhone’s AP so I gave up on that idea early on.
So, in order to develop the code that didn’t require the internet I placed the device into manual mode. What does manual mode do? It allows the code to start execution despite not being connected to the Particle cloud. That way you can take readings all day but you don’t have to be connected to Wifi. You can put the device in manual mode by putting this define in your .ino file:
SYSTEM_MODE(MANUAL);
In battery powered applications, this is ideal. Wifi is expensive power-wise and you don’t need to be running it if you don’t have to!
In a previous experiment, I found that it took about 10-15 seconds from nothing to sending data to the Particle cloud. That’s a long time in the embedded world. That’s one of the main reasons I suspect Particle came out with their mesh system. This allows sleepy end nodes (or nodes that are taking data and periodically sending it to a central point) to run much longer than their Wifi based cousins.
Remember you will have to run the Particle.connect() function in order to connect to wifi in manual mode. Or if you’re ready for it to re-connect, remove SYSTEM_MODE(MANUAL); from your .ino file.
Changing Wifi Credentials
During my experiment in trying to get my wifi to work I did discover a few handy Particle tools to change wifi credentials etc. By holding the mode button during operation, the device eventually starts blinking blue. Once blinking blue, you can issue a particle serial wifi which will walk you through the process of changing the credentials.
The above process is light years faster than using the iPhone/Android app. I thought the app was cool at first but man does it take a long time to scan and get your devices connected.
More info on this procedure go here.
Recovering when things go awry
I had to recover my Argon during my development process. I did some digging and found that re-programming the OS, App and Bootloader seemed to do the trick.
Get the files here: Release 0.9.0 (Gen 3) · particle-iot/device-os · GitHub (As of this writing the latest is 0.9.0)
Then program these files in DFU mode by holding the mode button after tapping the reset button once.
particle flash --usb system-part1-0.9.0-argon.bin
particle flash --usb tinker-0.9.0-argon.bin
Program this one in Listening mode:
particle flash --serial bootloader-0.9.0-argon.bin
Note: the -argon suffix may be different depending on what you’re programming to. Other options are -boron and -xenon.
Monitoring on the command line
Finally, one of the most useful commands is this one:
particle serial monitor --follow
This allows you to use the USB Serial interface to receive debug messages from he device. This is akin to connecting an FTDI device to an Arduino.
For instance, I may be debugging part of the code so I want to see some data. In the Setup() function I’ll be sure to run Serial.begin(), then later on I’ll make a Serial.printf(“data: %d”,data.tvoc); in order for it to be sent over the USB Serial interface.
Serial UART for debugging, it’s a beautiful thing.
Publishing
One thing I did discover during the development process was the publishing limits of the Particle platform. For a single device, you cannot Particle.Publish more than 4 pieces of data in one second. Even though I was taking data every minute, I was sending 6 pieces of individual data to the server at the same time. After testing I soon started to wonder why the heck my C02 and TVOC readings disappeared.
I had found the culprit.
So, in order to make things work, I had to format it as a JSON blob. See how I did it exactly below:
String out = String::format("{\"temperature\":%.2f,\"humidity\":%.2f,\"pm25\":%d,\"pm10\":%d,\"tvoc\":%d,\"c02\":%d}",si7021_data.temperature,si7021_data.humidity,hpma115_data.pm25,hpma115_data.pm10,ccs811_data.tvoc,ccs811_data.c02);
Particle.publish("blob", out , PRIVATE, WITH_ACK);
I created a JSON structure and then used String::format to insert each piece where they needed to be. If you are running your device over LTE this will cause you to send more data than necessary. There are better options like Protocol Buffers or using MessagePack. If you’re dealing with complex data, I recommend the former because of its programatic nature. Plus, you can use it with just about any programming language. So web to embedded? No problem.
After every minute, I only send the data when all three sensors have been read. I use three separate boolean values to determine the state of the sensor readings. Once they have all been set to true do I invoke the Particle.Publishcall.
Then after publishing, I reset all variables like so:
ccs811_data_ready = false;
si7021_data_ready = false;
hpma115_data_ready = false;
Then, everything starts all over again. You can also create a status struct which has each of these flags neatly inside. Considering I only have three data points, I didn’t go the extra mile there.
Publishing to Google Docs Using a Webhook
Here comes the fun stuff.
Once your device is publishing to the cloud, how do you use it?
In practicality, this solution is only for me. I don’t plan on spinning up a backend. I don’t anticipate bajillions of people to use my service. I just want to see the data.
So, after some research I landed on some handy information about Google Docs. In particular Sheets.
The big idea is that for every update, there’s a magical script that turns the data into a new line in Google Sheets. As data is added, the document will continually update as data flows in.
How does it all work?
Read on!
You can push data to a Google Sheet by creating a Webhook specifically tied to a Sheet. I’ve outlined the process below:
-
Go to
Tools->Script Editor. This should pop open a script window.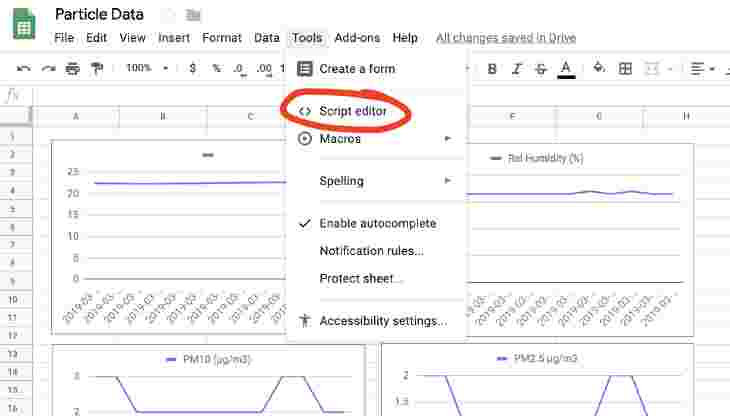
-
Create a new script. And copy the contents of what I’ve written below:
//this is a function that fires when the webapp receives a POST request
function doPost(e) {

  //Return if null
  if( e == undefined ) {
    Logger.log("no data");
    return HtmlService.createHtmlOutput("need data");
  }

  //Parse the JSON data
  var event = JSON.parse(e.postData.contents);
  var data = JSON.parse(event.data);

  //Get the last row without data
  var sheet = SpreadsheetApp.getActiveSheet();
  var lastRow = Math.max(sheet.getLastRow(),1);
  sheet.insertRowAfter(lastRow);

  //Get current timestamp
  var timestamp = new Date();

  //Insert the data into the sheet
  sheet.getRange(lastRow + 1, 1).setValue(event.published_at);
  sheet.getRange(lastRow + 1, 2).setValue(data.temperature);
  sheet.getRange(lastRow + 1, 3).setValue(data.humidity);
  sheet.getRange(lastRow + 1, 4).setValue(data.pm10);
  sheet.getRange(lastRow + 1, 5).setValue(data.pm25);
  sheet.getRange(lastRow + 1, 6).setValue(data.tvoc);
  sheet.getRange(lastRow + 1, 7).setValue(data.c02);

  SpreadsheetApp.flush();
  return HtmlService.createHtmlOutput("post request received");
}
Note: some folks have gotten a “Illegal character” when pasting this into thescript box on Google Docs. I’ve created a Gist that should have the correct whitespace. [You can get it here.](https://gist.github.com jaredwolff3cda7fd3fb75ad928be70ffcb9fd9c7e)
I’ve based the code originally on the [post I found on the subject.](https://blo runscope.com/posts/tutorial-capturing-webhooks-with-google-sheets)
-
Then I went to
Publish->Deploy as web app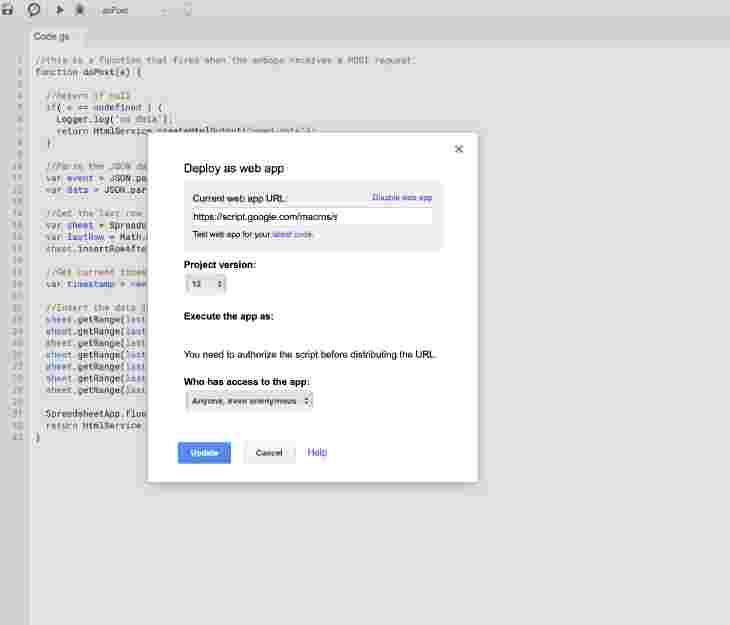
-
Remember, this app shouldn’t be used by anyone else except you. You can set
Execute the app asand select yourself. -
Finally,
Who has access to the appisAnyone, even anonymousotherwise it will require authentication which would not work! If you have already published, you will have to change theProject Versiontonewin order for your changes to apply. -
In the Particle console, go to the
Integrationssection and create a newWebhook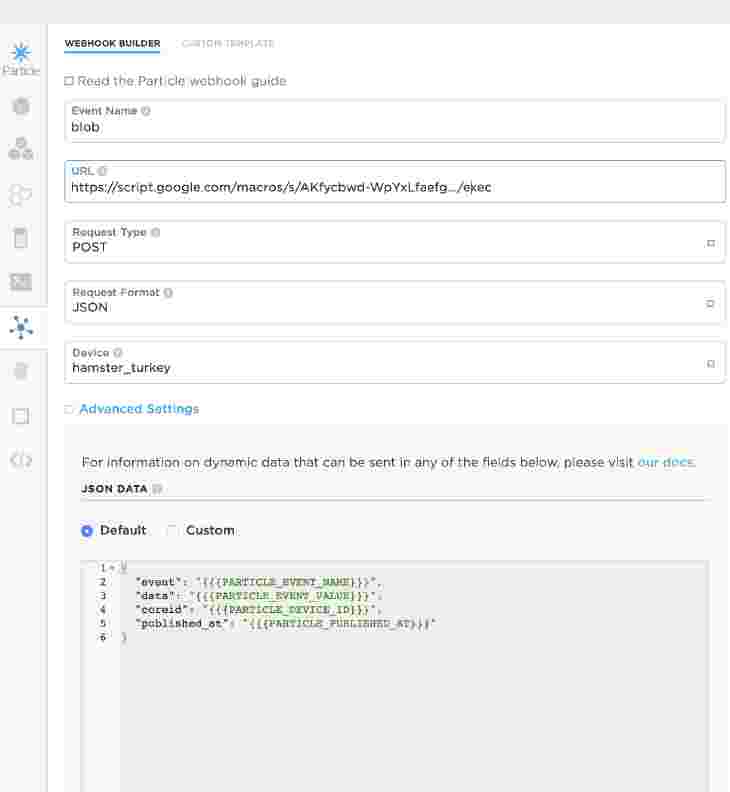
-
Fill in the name of the event you want to forward. In our case it’s
blob -
Enter the URL provided in Step 5
-
Make sure the request format is
JSON. You can keep the default JSON format. KeepEnforce SSLenabled. -
Make sure the device that you want to watch is defined. In my case I’m using the name that Particle gave my device
hamster_turkey(awesome name, right?) -
Go down to the bottom and click
Save -
If your Particle is programmed, you should start seeing updated data populate the Google Sheet. You can put data into graphs that update in real time.

Note: This type of data collection isn’t great for large amounts of data spanning more than a few days. It’s great though for short time trials and tests though! I originally was using IFTTT but the data collection was sporadic. Now it’s quite consistent!
You can see my live example down below:
Live Example
Want to take a deeper look? Here’s a link to the Google Doc.
Another Way: Using Adafruit IO
-
Create an account here: https://io.adafruit.com
-
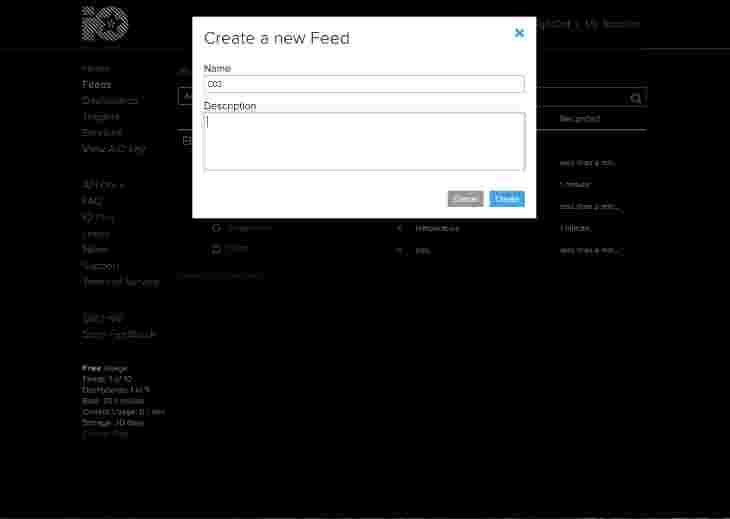
Next is to create feeds for each of the data types. We’ll need 6 in total.
-
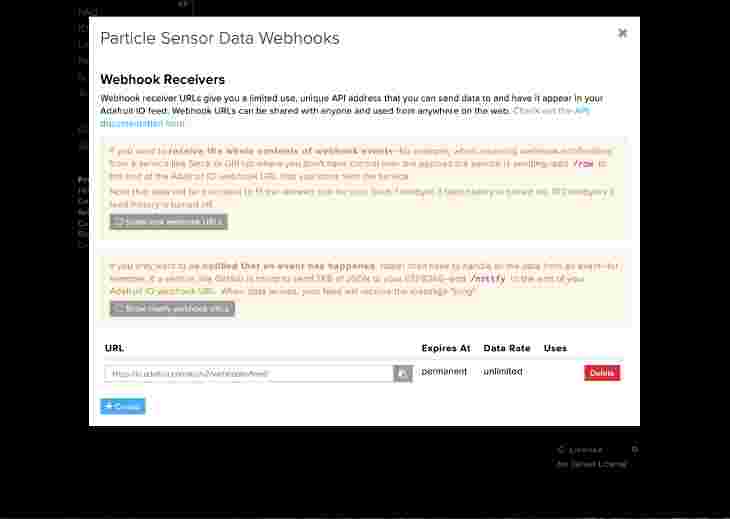
For each feed, add a Webhook.
-
Take each webhook address and create a new Webhook in the Particle console
-
Change the
Request formatto JSON -
Then under
Advanced Settingsclick onCustomfor the JSON DATA -
Replace what’s there using mustache templates. Adafruit IO is looking for a JSON key called
value. So set it like this:{ “value”:”{{{c02}}}” }You can replace
c02with any of the keys in your JSON blob. As a reminder the current JSON blob looks something like this:{ “temperature”:21.2, “humidity”:30, “pm10”:2, “pm25”:1, “tvoc”:650, “c02”:1001 } -
Repeat this as necessary until all feeds have a corresponding Webhook configured.
-
Finally, you can create a dashboard to see them all in one place. This is straight forward just follow the on screen prompts. :)


You can check out my live dashboard here. It’s nifty and just another way to display your data.
Sidenote: My first impressions on Adafruit IO are good. It was easy to setup and start using. The main drawback that it’s tedious especially if you have more than a handful of data points. But maybe they’ll fix that in the future!
Update: If you have multiple pieces of data. You can point your Particle integration to a single endpoint. Just make sure the data is in the same group! Here’s an example of multiple values sent to the same group:
{
  "feeds": [
    {
      "key": "tvoc",
      "value": "{{{tvoc}}}"
    },
    {
      "key": "c02",
      "value": "{{{c02}}}"
    },
    {
      "key": "temperature",
      "value": "{{{temperature}}}"
    },
    {
      "key": "humidity",
      "value": "{{{humidity}}}"
    },
    {
      "key": "pm2-dot-5",
      "value": "{{{pm25}}}"
    },
    {
      "key": "pm10",
      "value": "{{{pm10}}}"
    }
  ]
}
Where your URL should look something like:
https://io.adafruit.com/api/v2/<USERNAME>/groups/<GROUPNAME>/data
That should keep your Particle integration page a little more sane!
Making sense of the readings
The readings can be confusing. Here’s the breakdown of how they work:
- Humidity is showing in relative percentage points. This is the relative humidity we know and love. Remember it may differ with what’s outside. This depends on if your house is air conditioned or if you’re running a heater etc.
- Temperature is in degrees C (can be modified in firmware if you so choose)
- TVOC is in ppb (parts per billion). VOCs can be in the form of harmful chemicals you have around the house. More information about VOCs check out thislink from the EPA.
- C02 is in ppm (parts per million). We breathe in oxygen and exhale carbon dioxide. You may find your VOC and C02 levels rising when you’re in the room. C02 does correlate to VOCs as well. More info in the data sheet.
- PM10. Is in µg/m3 (micrograms per meter cubed). The particle sensor uses a scattered laser when then shines across the air chamber to a sensor on the other side. The more the rays are blocked, the more particles in the air. The particle sensor then does some calculations to determine the amount of particles in a certain volume and thus your µg/m3.
- PM2.5 is the same as above but it tracks much smaller particles. (Less than or equal to 2.5µm in size!) More information on the EPA’s website here.
Don’t care for something you have no control over?
Check out my tutorial on creating your own amazing looking IoT dashboard.
Update: Cool Insights Since Using
Here are some insights that I personally have had since using this sensor setup.
Insight 1 - Watch What You’re Cooking

Since building The Canary, it’s “sung” for me a couple times. Every time it was after I had just finished cooking (and burning) some food on the stove. Turns out that cooking will release “unhealthy” amounts of PM2.5 particles. I promptly turned on the air filter and the high levels immediately dissipated! It pays to have a high quality air filter! (We have a Blu Air 211+)
Insight 2 - You May Get Something Other Than Heat

The home I was living in when I first developed this project had baseboard heat.
If anyone is familiar with the concept, you have a furnace that pumps wickedly hot water into pipes with fins on them around your house. The fins help dissipate the heat in the pipe and thus heats the air. After a while, dust gets stuck to the fins (especially after the summer). When the furnace comes back on in the fall, the stuff will burn off at the price of you breathing it in!
I measured the PM2.5 values during the “burn off” phase. The sensor was saturated and was indicating a value over 1000 ug/m3! We took immediate precautions including opening the windows and running a fan for 30 minutes until levels got back to healthy. Of course, I had to be a scientist and see what would happen if we ran it longer. It immediately saturated again a few more times. The chart above shows 3 cycles of this.
You did it!
Congrats. You’ve made it this far. You deserve a day at the spa. Or maybe some chocolate ice cream. Or if you’re really feeling adventurous, both, at the same time. 🍦🛀
After building one of these you may feel like your time is worth investing elsewhere. Maybe you want to build a cool web backend with fancier charts and algorithms. Maybe even use some machine learning (why not!)
If you want something already assembled and available you should check out the Air Quality Wing. It has everything here including the ability to switch on and off the HPM particle sensor. You can even run it on batteries! So put that sucker anywhere you want. Check it out here.
Here’s how easy it is to get started:
Air Quality Wing Setup
NOTE: this article covers usage of the previous Air Quality Wing library and hardware. Please refer to the docs for the latest version of the Air Quality Wing
-
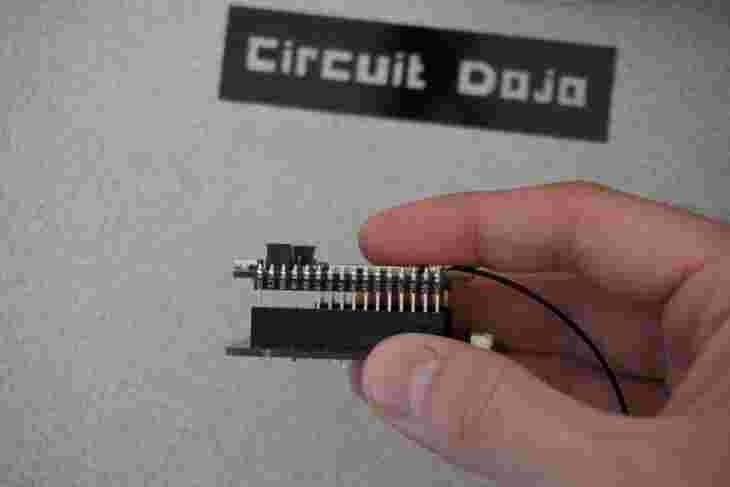
Plug in your board
-
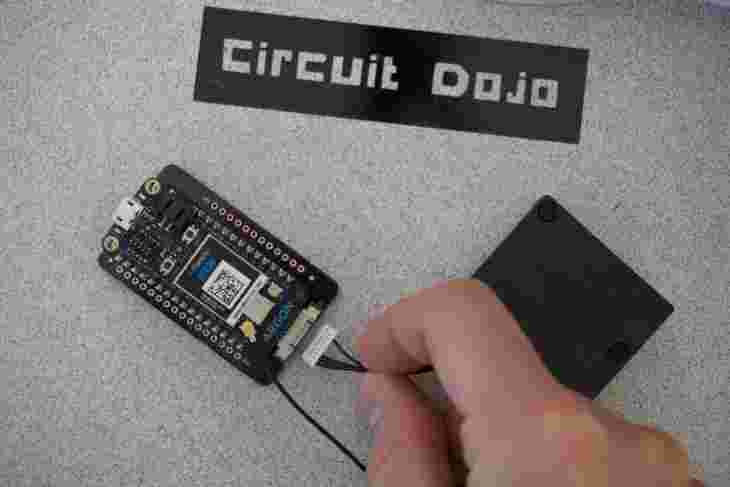
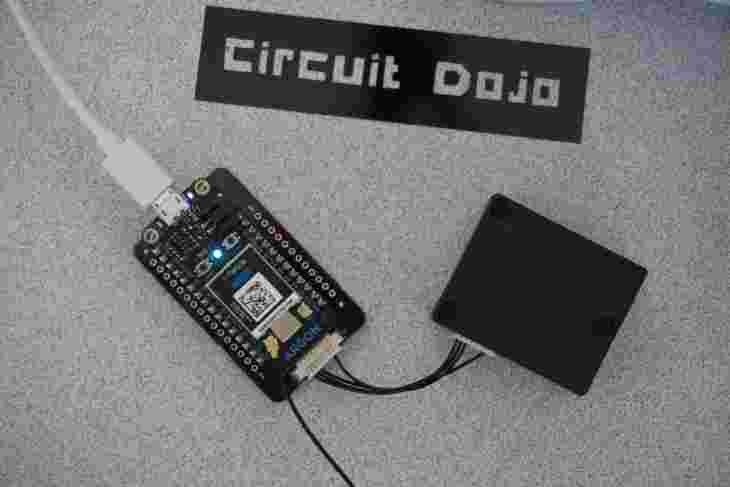
Connect the HPMA115S0 particle sensor
-
Power it up
-
And program!
Code and Source
This whole project is released under the Creative Commons Share-Alike license. Get the hardware files here. You can check out the firmware code on Github.
Special note about the code: the code will work out of the box with a Particle based board. Feather boards may require some extra rework for it to work properly.
Curious Why I Chose The CCS811 + Si7021 Combo?
Thanks for reading! Let me know what you think in the comments. I’d make my day.
Last Modified: 2021.12.8


